
We aim to give food for thought as well as inspiring your creativity and
providing practical ideas you can’t wait to implement in your own settings!
10 Inspiring Outdoor Art Ideas
With the warm weather and summer holidays looming, it’s the perfect time to take advantage of outdoor opportunities for art and craft activities.
A range of activities can be undertaken; some may cost a little for resources if you don’t already have these to hand, but many are free!
Balconies, gardens, parks and beaches can all form a great backdrop for fresh air fun.
A mini outdoor art studio can be created quite simply by attaching a sheet to a fence or tree as a shade, or using a mini tent if one is available. By packing a lidded stacker box with some resources, the tools and materials for outdoor projects can be readily available. You could also create challenge cards so that ideas are there at hand.
Artwork could be pegged onto fences, branches or washing lines to create an alfresco gallery.
Photographs can be taken of “temporary” artworks, and, on rainy days, these could be combined to create virtual collages or printed out to form actual ones.
For some of the suggestions, it’s a good idea to remember to set out boundaries for children, e.g., not to pick the flowers in public spaces, take nothing but photos and leave nothing but footprints.
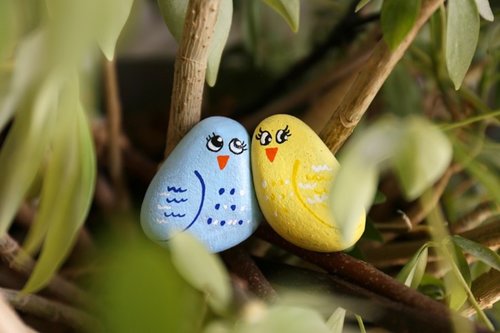
1. Pebble painting
You will need:
• Pebbles
• Acrylic paint (some of these are able to self-seal, otherwise use spray sealant)
• Brushes or use permanent markers such as Sharpies.
What to do:
Decorate the pebbles with patterns or designs inspired by nature, or creatures such as birds or ladybirds. Place them around the garden for fun surprise features or use them as markers on a treasure trail.
2. Squirt gun / splatter painting
You will need:
• Paper
• Squirt gun + water-based paint (thinned down with water so the gun nozzle doesn’t get clogged)
• Or a variety of brushes + un-diluted paint.
What to do:
Squirt or flick/drip paint onto paper. Explore the different effects when the paper is horizontal vs. vertical.
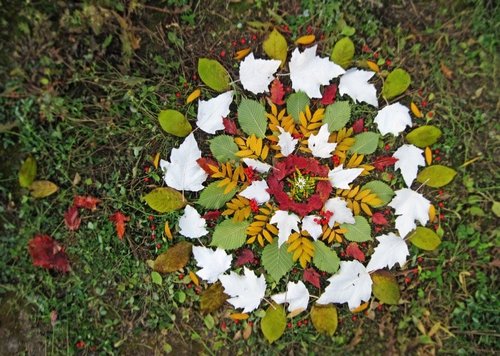
3. Nature mandala / patterns / beach sand drawing / sculpture using found objects
You will need:
• Leaves, petals, stones, shells etc.
What to do:
Collect objects and arrange into circular or linear repeating patterns onto paper, grass, paving, earth, sand etc.
“Draw” into sand using fingers/sticks/shells etc, exploring the difference when doing this in wet vs. dry sand.
Arrange objects into 3-D positions by stacking, leaning, suspension etc. Create a frame to enclose the work using twigs, seaweed, pebbles etc.
4. Natural weaving on twig loom
You will need:
• Twigs/lengths of narrow wood
• Bicycle wheel
• String (or any other type of yarn)
• Leaves, stalks, grass, petals etc.
What to do:
Create a loom by fixing twigs/wood lengths together to create a framework (this can be triangular, square, oblong etc. You won’t need to do this if using a spoked wheel). Tie string from one edge to another. Weave objects in and around the framework, exploring different methods.
5. Crayon rubbings
You will need:
• Light-weight paper
• Chunky crayons
• Masking tape (optional)
What to do:
Hold or tape paper against different surfaces such as paving slabs, manhole covers, tree bark. Hold the crayon horizontally and rub this across the paper to reveal and explore different textures.
6. "Paint" with water
You will need:
• Water
• Brushes (or rolled and frayed kitchen roll)
What to do:
Explore making marks onto paving slabs or concrete. Draw symbols, create patterns, make handprints by applying water to different surfaces. Observe how these “fade” due to heat evaporation.
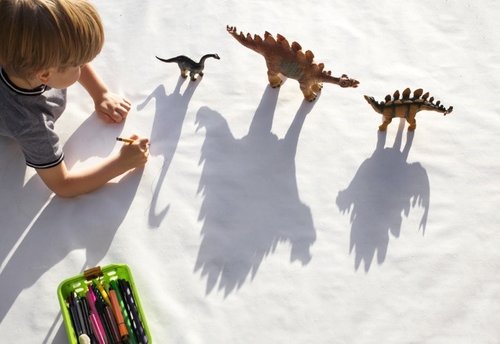
7. Shadow art
You will need:
• Paper
• Drawing media (pens, pencils, charcoal, paint etc)
• Toys (optional)
What to do:
Identify areas of shadow created by toys, plants, branches etc). Place paper where the shadow falls and use drawing medium to trace the outline of the shadow. This could be repeated at different times to explore the varying shadows created during the day. The outlined silhouette could be filled in using block colour, patterns etc. If toys have been used, the “background” could be the focus of decoration, e.g., a dinosaur silhouette could be embellished with a plant-inspired painted panorama.
8. Paint face/body

You will need:
• Water-based non-toxic face/body paints
• Mirror (optional)
• Brushes (optional)
What to do:
Children can decorate themselves or their friend with designs inspired by nature, e.g., plants, creatures, colours, and textures.
9. Colour mixing
You will need:
• Ready-mix/powder paints (primary colours + black and white)
• Palette (or plate)
• Small measure, e.g., teaspoon
• Paper
• Brushes
• Pencil
• Simple chart to record “ingredients” (e.g., name of object, colours)
What to do:
Choose a flower/foliage to try to colour match. Use a measuring spoon to add colour paint to the mix, tallying the amount of each colour added onto the sheet until the closest match has been made. Paint a small square of each mix result onto paper to chart the progress.
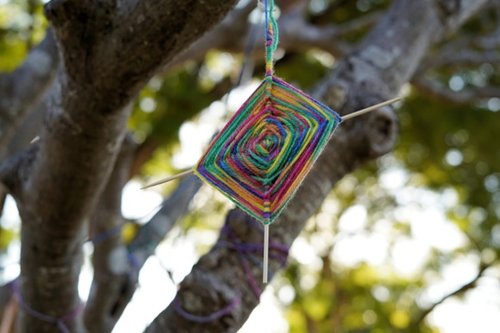
10. Natural dyes & "God's eye" decorative hangings
You will need:
• Light coloured yarn (pure wool or cotton)
• Variety of saved waste/cupboard items (e.g., used teabags, onion skins, red cabbage leaves, beetroot, turmeric etc.)
• Containers, water,
• Twigs, or lolly sticks
What to do:
Save/collect the dyestuffs. Place each type into a container with a share of the yarn and fill with water (this can be done with boiling water, but you will still get results with cold water if your containers are not suitable for high temperatures). Place these outside (they can be a bit fragrant)! Check over the course of several days to monitor the absorption of the dye. When the colour is rich enough, wring out the yarn (wearing rubber gloves to avoid staining) and leave to dry. To make the god’s eye decorations, create a cross shape with two twigs or lolly sticks and glue or tie into position. Wrap one end of a length of dyed yarn to the centre of the cross and turn it several times to secure. Then wrap across one section of the X, round the back and turn*. Repeat this until the shape is covered/the yarn runs out. Tie or glue the end. You can change colours throughout the process by attaching the next colour yarn to the previous one and cutting off the excess. When the decoration(s) are complete, attach a loop of yarn and hang them in the garden. (Natural dyes like these have not been fixed and so will fade in sunlight.)
* There are plenty of tutorials online to guide you through these steps, but once you have made one, it will become imprinted in your muscle memory!
With many thanks to Jayne Gilbert for writing this article.
Jayne is a teacher with over 30 years’ experience, both in primary schools and as a specialist tutor.